How to Groom a Dog in 9 Easy Steps

Meraki Dogs may earn a small commission when you buy through links on this site at no cost to you. See our disclaimer here.
Ever look at your dog and think, You need a bath—but dread the mess and struggle that comes with it?
Grooming at home can save you money, keep your dog comfortable, and even strengthen your bond. Plus, regular brushing, bathing, and nail trims prevent painful matting, infections, and excessive shedding.
The good news? You don’t need pro-level skills to do it right. Whether you’re a beginner or looking to refine your technique, this guide will show you exactly how to groom a dog at home in nine simple steps.
Key Takeaways
- Patience and consistency make grooming an enjoyable bonding experience.
- Grooming isn’t just about appearance—it’s crucial for your dog’s health.
- Regular brushing prevents painful mats and reduces shedding.
- Bathing should be done properly to avoid skin irritation and infections.
- Nail trimming prevents overgrowth, which can lead to painful walking.
- Cleaning ears and brushing teeth are essential for overall hygiene.
- The right tools can make the entire process easier and safer.
How should you get started on grooming your dog? Here’s a list of steps at a glance:
- Brush Your Dog
- Bathe Your Dog
- Wipe Your Dog’s Eyes
- Dry Your Dog
- Brush Your Dog’s Coat
- Trim Your Dog’s Coat
- Trim Your Dog’s Nails
- Clean Your Dog’s Ears
- Brush Your Dog’s Teeth
Read on for in-depth instructions, tips, and tricks to groom your dog like a pro!
The Importance of Grooming Your Dog
Whether you do it yourself or take your dog to a professional, grooming is non-negotiable. Beyond making your dog look nice, it plays a crucial role in:
- Preventing Skin Issues – Dirt, debris, and excess oil can cause infections or irritations.
- Reducing Shedding – Brushing helps control the endless fur tumbleweeds in your home.
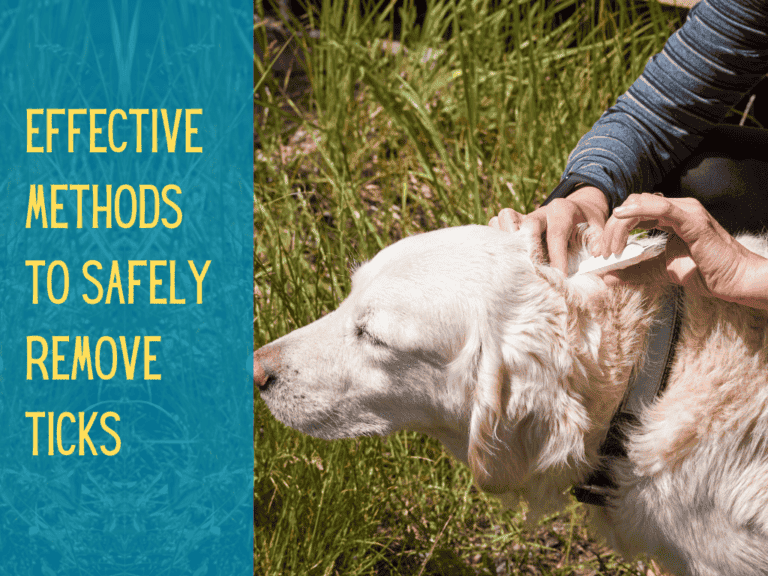
- Detecting Health Problems Early – Grooming gives you a chance to check for lumps, fleas, ticks, or skin issues.
- Preventing Painful Matting – Mats aren’t just ugly; they hurt. They pull on the skin, causing discomfort and even sores.
- Bonding With Your Dog – Grooming builds trust and strengthens your relationship.
So, let’s break it down into nine easy steps to make grooming at home a breeze.
How to Groom a Dog at Home
With the right tools and techniques, you’ll be able to handle brushing, bathing, trimming, and more—just like a pro.

Step 1: Brush Your Dog
Brushing your dog isn’t just about keeping them looking nice—it prevents painful mats, reduces shedding, and improves skin health by distributing natural oils. It’s also the perfect time to check for fleas, ticks, or skin issues.
How Often Should You Brush?
The right frequency depends on your dog’s coat type:
- Daily – Long-haired breeds (Golden Retrievers, Shih Tzus, Poodles, Collies) to prevent mats.
- 2-3 times a week – Medium-coated breeds (Cocker Spaniels, Border Collies) to remove loose fur.
- Once a week – Short-haired breeds (Boxers, Labs, Beagles) to keep their coat healthy.
- During shedding season – Increase brushing for double-coated breeds (Huskies, German Shepherds, Corgis).
Choosing the Right Brush for Your Dog
Using the right brush makes a huge difference:
- Slicker brush – Ideal for thick, curly, or long coats. Helps remove tangles and loose fur.
- Pin brush – Best for medium to long-haired dogs. Gentle on the coat and removes debris.
- Bristle brush – Perfect for short-haired breeds. Helps distribute natural oils for a shiny coat.
- Rubber brush – Great for deshedding short-haired dogs like Boxers and Pit Bulls.
- Undercoat rake – A must for double-coated dogs. Removes loose undercoat fur to reduce shedding.
Pro Tip
Avoid the Furminator for daily use on double-coated dogs! It can cut the topcoat, leading to long-term damage.
How to Brush Your Dog Properly
Follow these steps to make brushing easy and stress-free:
- Pick the Right Spot – Brush your dog in a calm, distraction-free area.
- Use the Right Tool – Choose a brush suited for their coat.
- Start with Light Strokes – Gently brush in the direction of hair growth.
- Check for Mats & Tangles – If you find a mat, don’t yank! Use a detangling spray and work it out with a comb.
- Be Extra Gentle on Sensitive Areas – Ears, belly, and legs require a softer touch.
- Finish with a Final Once-Over – Run your hands over your dog to ensure all tangles are out.
Pro Tip
Never bathe a matted dog! Mats tighten when wet, making them harder to remove. Always brush before bath time.

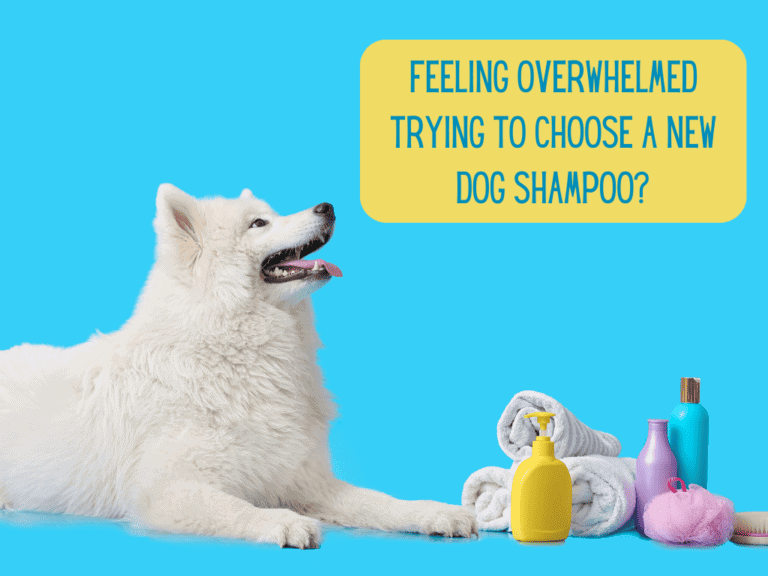
Step 2: Bathe Your Dog
A clean dog is a happy dog—but overbathing can cause dry, irritated skin. Bathing the right way keeps their coat fresh while protecting natural oils.
How Often Should You Bathe Your Dog?
- Every 4-6 weeks – Most dogs.
- Every 2-3 weeks – Dogs prone to skin issues or strong odors.
- As needed – If your dog rolls in mud or something gross.
- Rarely (or never!) – Some breeds with water-resistant coats (Huskies, Malamutes) do best with minimal bathing.
Pro Tip
Overbathing strips natural oils, causing dryness and itching. If your dog needs frequent washes, use a moisturizing dog shampoo.
How to Give Your Dog a Stress-Free Bath
- Gather Your Supplies – Have everything ready: dog shampoo, conditioner (if needed), a towel, and a cup or sprayer.
- Secure Your Dog – Use a bathing lead to prevent them from bolting mid-bath.
- Brush Before Bathing – This removes tangles and loose fur (wet mats are a nightmare to deal with!).
- Use Lukewarm Water – Too hot or too cold can stress your dog. Test with your wrist first.
- Wet the Coat Thoroughly – Start at the neck and work your way down. Avoid getting water in their ears.
- Apply Dog Shampoo – Work into a lather, focusing on dirty areas like paws and belly.
- Rinse Completely – Leftover shampoo can cause irritation. Rinse until the water runs clear.
- Apply Conditioner (Optional) – Helps prevent tangles in long-haired dogs. Leave on for 2-3 minutes, then rinse.
- Dry Thoroughly – Use a towel first, then a dog dryer if your pup tolerates it.
Never use human shampoo – It’s too harsh and can disrupt your dog’s skin pH.
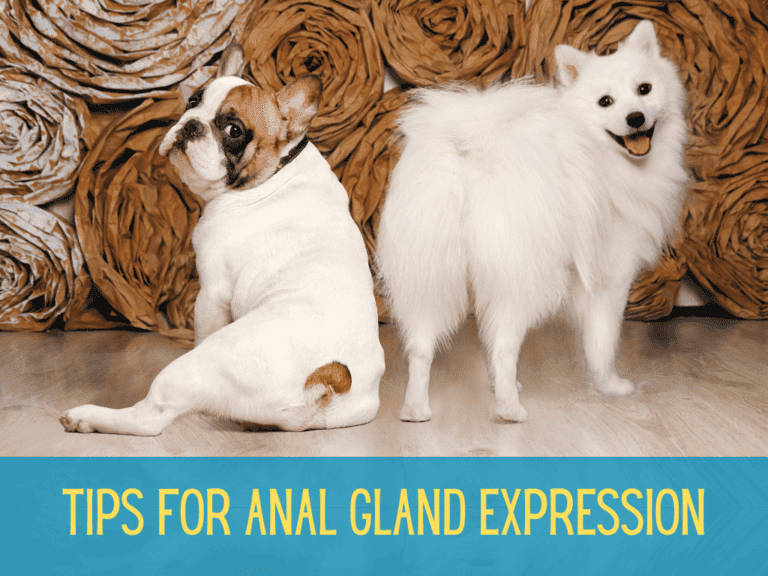
What About Anal Glands?
You might have heard that groomers express a dog’s anal glands during baths. Don’t do this at home unless instructed by a vet! Dogs naturally express their glands when they poop, and unnecessary manual expression can cause irritation or damage.

Step 3: Wipe Your Dog’s Eyes
Eye care is an often-overlooked part of grooming, but it’s essential—especially for breeds prone to tear stains or discharge. Regular cleaning prevents irritation and infections.
Why Cleaning Your Dog’s Eyes Matters
- Prevents tear stains – Light-colored dogs (Maltese, Poodles) often develop reddish-brown stains around their eyes due to excessive tearing.
- Removes dirt and debris – Dust, pollen, and gunk can collect in the corners of the eyes.
- Helps detect eye problems early – Cloudiness, redness, or excessive discharge could signal an infection or health issue.
How to Safely Clean Your Dog’s Eyes
- Trim Excess Fur Around the Eyes – Long hair can trap moisture and cause irritation. Use blunt-tip grooming scissors for safety.
- Use a Damp Cotton Ball or Soft Cloth – Moisten with warm water or a vet-approved eye wipe.
- Gently Wipe Away Discharge – Start from the inner corner and wipe outward.
- Use a Separate Cloth for Each Eye – This prevents spreading bacteria if one eye is infected.
- For Stubborn Tear Stains, Use a Dog-Safe Tear Stain Remover – Avoid hydrogen peroxide or harsh chemicals.

Step 4: Dry Your Dog
Drying your dog properly after a bath is just as important as the bath itself. A damp coat can cause skin irritation, odors, and even infections—especially in thick-coated breeds.
Why Proper Drying Matters
- Prevents Skin Issues – A damp coat can lead to hot spots and fungal infections.
- Reduces Shedding – Drying helps remove loose fur before it ends up on your furniture.
- Keeps Your Dog Comfortable – No one likes being wet and cold, including your dog!
Best Ways to Dry Your Dog
Let Them Shake It Off
Dogs naturally shake off about 70% of excess water—let them do their thing before grabbing a towel!
Towel Dry Thoroughly
- Use an absorbent microfiber towel for best results.
- Pat dry instead of rubbing to prevent tangles and mats.
- Pay extra attention to the ears, belly, and paws where moisture hides.
Use a Dog Dryer (Optional but Effective!)
A dog-specific dryer speeds up the process and prevents damp spots in thick fur. If your dog is new to the dryer:
- Start with low heat and low airflow.
- Hold the dryer several inches away to avoid overheating.
- Keep it moving—never focus on one spot too long.
- Use treats to create a positive association.
Air Drying
If you let your dog air dry:
- Keep them indoors in a warm, draft-free area.
- Avoid letting them roll in dirt while still damp.
Pro Tip
Don’t Use a Human Hair Dryer! Most get too hot and can burn your dog’s skin.

Step 5: Brush Your Dog’s Coat (Again!)
Now that your dog is clean and dry, it’s time for a final brush. This step removes any loose fur, prevents tangles, and leaves your dog’s coat looking its best.
Why Brushing After Bathing Matters
- Removes Leftover Loose Fur – Wet fur tends to clump together, so brushing helps get rid of anything left behind.
- Prevents Mats – Water can cause fur to tangle, especially in long-haired breeds.
- Distributes Natural Oils – Brushing spreads your dog’s natural oils, keeping the coat healthy and shiny.
How to Brush After a Bath
- Choose the Right Brush – Use the same brush type you used before the bath (slicker, pin, bristle, or undercoat rake).
- Work in Sections – Start at the head and work your way down to avoid missing any spots.
- Brush in the Direction of Hair Growth – This prevents pulling and discomfort.
- Be Gentle on Sensitive Areas – Use a softer brush for the ears, belly, and legs.
- Use a Detangling Spray for Stubborn Areas – If you encounter a tangle, don’t yank—work it out gently.
Pro Tip
For Double-Coated Dogs: Use an undercoat rake to remove loose fur without damaging the protective topcoat.

Step 6: Trim Your Dog’s Coat
Not all dogs need a haircut, but for those that do, trimming helps keep them comfortable, clean, and looking their best. Even if your dog doesn’t require a full-body trim, some areas—like the paws, face, and sanitary regions—often need a little touch-up.
Should You Trim Your Dog’s Coat?
- Needs regular trimming: Poodles, Shih Tzus, Maltese, Yorkies, Schnauzers, and other breeds with continuously growing hair.
- Needs occasional touch-ups: Golden Retrievers, Border Collies, Cocker Spaniels—especially around paws, ears, and sanitary areas.
- Should NEVER be shaved (unless medically necessary): Huskies, German Shepherds, Labs, Golden Retrievers, and other double-coated breeds. Shaving these breeds damages their coat and affects their ability to regulate temperature.
Areas That Usually Need a Trim
- Feet & Paws – Keeps dirt and debris from collecting. Trim between paw pads for better traction.
- Sanitary Areas – Helps with hygiene, especially for long-haired breeds.
- Face & Eyes – Prevents fur from obstructing vision. Use blunt-tip scissors for safety.
- Ear Area – Reduces trapped moisture, lowering the risk of infections.
How to Safely Trim Your Dog
- Use Dog-Specific Scissors or Clippers – Dull or incorrect tools can pull hair or cause injury.
- Work in a Well-Lit Area – Good lighting helps prevent mistakes.
- Hold Your Dog Steady – Have them sit or stand on a non-slip surface.
- Trim Slowly & Gently – Take small snips, especially near sensitive areas.
- Use a Comb for Even Trimming – Lift the fur with a comb and trim a little at a time to avoid cutting too much.
Pro Tip
Avoid Clippers on Sensitive Areas – Clippers can be too harsh near the eyes, ears, and face. Use scissors instead.
Should You DIY or Go to a Groomer?
- Go to a pro if: Your dog requires a full haircut, has mats, or is nervous during trims.
- DIY if: You only need to trim small areas or have experience with grooming.

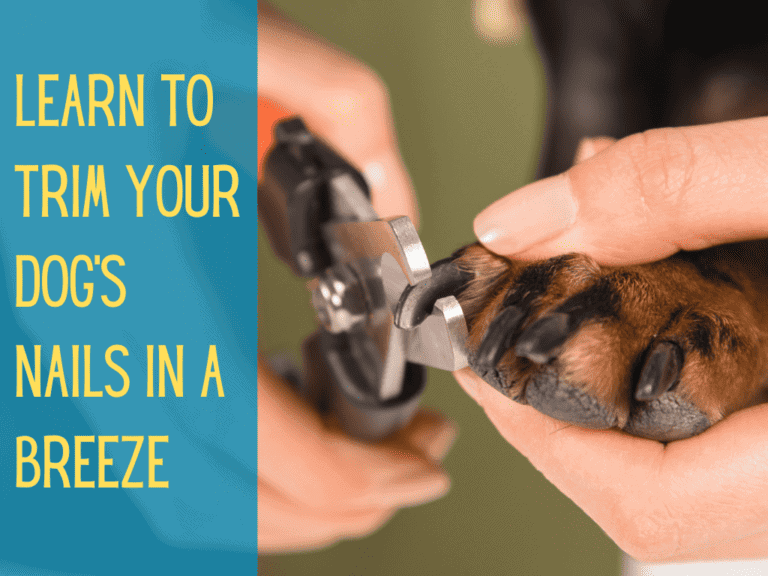
Step 7: Trim Your Dog’s Nails
Overgrown nails aren’t just unsightly—they can cause pain, posture problems, and even lead to joint issues. Keeping your dog’s nails trimmed helps them walk comfortably and prevents injury.
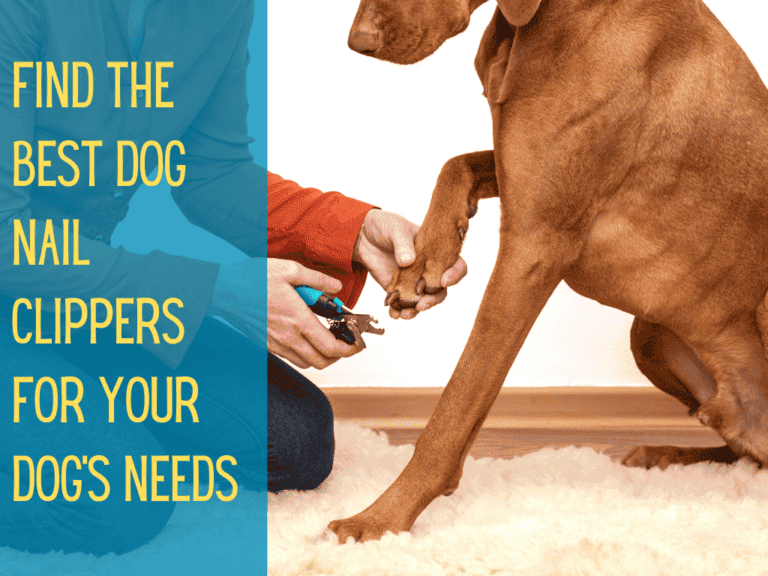
Tools You’ll Need
- Dog Nail Clippers
- Grinder (optional) – Smooths edges and prevents sharpness.
- Styptic powder or cornstarch – Stops bleeding if you cut too short.
How to Trim Nails Without Causing Stress
- Get Your Dog Comfortable – Let them sniff the clippers and give treats before starting.
- Hold the Paw Firmly but Gently – Press lightly to extend the nail.
- Clip Small Bits at a Time – Cut at a slight angle, avoiding the quick (the pink section with blood vessels).
- For Dark Nails, Look for the Pulp – Stop cutting when you see a grayish-white oval inside the nail—this means you’re close to the quick.
- File or Grind to Smooth Edges – This option prevents snagging and makes walking more comfortable.
- Reward Your Dog! – Treats and praise make future trims easier.
Pro Tip
Accidentally Cut the Quick? Apply styptic powder or cornstarch to stop the bleeding. Stay calm—your dog will take cues from your reaction.
What If Your Dog Hates Nail Trims?
- Break it up – Trim one or two nails at a time instead of all at once.
- Use a lick mat – Smear peanut butter on a mat to distract them.
- Try a grinder instead – Some dogs prefer the vibration over clippers.
- Go for a walk first – Exercising on pavement naturally files down nails and makes them easier to trim.

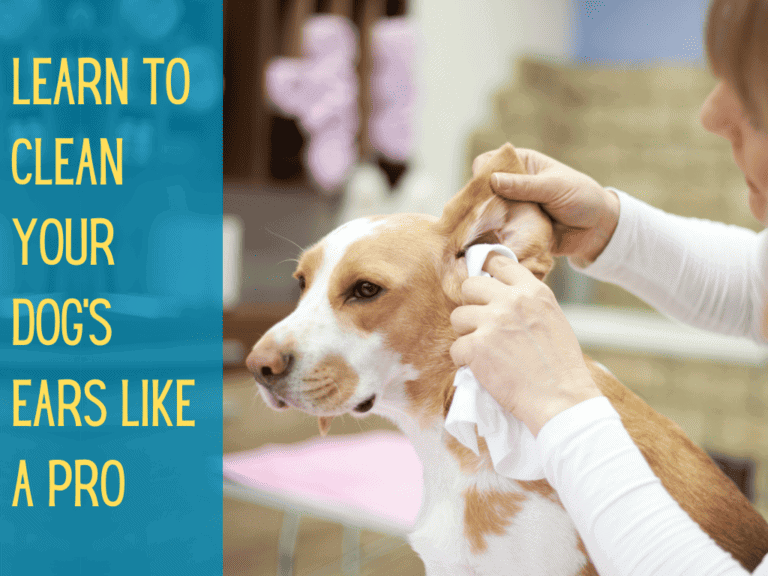
Step 8: Clean Your Dog’s Ears
Dirty ears can lead to infections, discomfort, and hearing problems—especially in floppy-eared breeds. Regular ear cleaning helps prevent wax buildup, bad odors, and infections.
What You’ll Need:
- Dog-safe ear cleaning solution (never use alcohol or hydrogen peroxide).
- Cotton balls or gauze (avoid Q-tips—they push debris deeper!).
- Treats (to make it a positive experience).
Safe Ear-Cleaning Tips
- Check for Signs of Infection – If you see pus, swelling, or excessive redness, call your vet before cleaning.
- Apply Ear Cleaner – Lift the ear flap and squeeze a few drops into the ear canal.
- Massage the Base of the Ear – This helps loosen wax and debris inside.
- Let Your Dog Shake It Out – Allow your dog to shake their head to expel loosened debris.
- Wipe Away Residue – Use a cotton ball or gauze to gently clean the outer ear and folds.
- Reward Your Dog! – Treats and praise help build a positive association.
When to See a Vet
If your dog’s ears are very red, have a strong odor, or are painful to the touch, they might have an infection or ear mites. Cleaning alone won’t solve these issues—consult your vet.

Step 9: Brush Your Dog’s Teeth
Dental care is often overlooked, but bad breath and tartar buildup can lead to serious health problems, including gum disease, infections, and even heart issues. Regular brushing keeps your dog’s teeth clean and their breath fresh.
What You’ll Need:
- Dog-safe toothpaste – Never use human toothpaste (it contains toxic ingredients like xylitol).
- Dog toothbrush or finger brush – Designed to fit a dog’s mouth and be gentle on gums.
- Dental wipes (optional) – A good alternative if your dog won’t tolerate brushing.
- Dental chews & water additives (optional) – Help reduce plaque but don’t replace brushing.
Brushing Your Dog’s Teeth Without a Fight
- Let Them Taste the Toothpaste – Most dog toothpastes come in flavors like chicken or peanut butter to make brushing enjoyable.
- Start Slow – Use your finger or a soft brush to rub the outer surfaces of their teeth.
- Focus on the Outer Teeth – Dogs’ tongues naturally clean the inside, so prioritize the outer surface.
- Brush in Circular Motions – Lift the lips and gently scrub each tooth.
- Keep It Short & Positive – Praise and reward your dog with a treat after brushing.
If your dog has severe tartar or gum disease, they may need a professional dental cleaning by a vet.
Did You Know?
Skipping dental care can lead to painful infections and costly vet bills!
Helpful Grooming Tools
Grooming at home is much easier when you have the right tools. Investing in quality equipment saves time, prevents stress, and makes the process more enjoyable for both you and your dog. Here are some essential tools that can improve your grooming routine:
Grooming Table
- For Fidgety Dogs – A grooming table helps keep restless dogs in place, preventing them from constantly moving or trying to escape.
- Ergonomic Benefits – If you regularly groom your dog, a table saves your back from bending over or kneeling on the floor, making sessions more comfortable.
- Better Control & Safety – Many grooming tables come with an adjustable arm and noose to keep your dog steady and secure.
Pro Tip
If you don’t want to invest in a professional grooming table, a sturdy, non-slip surface at waist height can work as an alternative.
Bathing Lead
- Keeps Your Dog in the Tub – A bathing lead attaches to a suction cup in the tub, preventing escape attempts.
- Improves Control & Safety – You can focus on washing your dog without them trying to bolt mid-bath.
- Helps Nervous Dogs Stay Calm – Securing your dog can make them feel safer and reduce their anxiety.
Pro Tip
Use a non-slip bath mat along with the bathing lead to prevent your dog from sliding around.

Why Does It Take 3 to 4 Hours to Groom a Dog?
If you’ve ever wondered why professional grooming takes so long, it’s because grooming involves more than just a bath. Several factors affect how much time is needed:
- Breed & Coat Type – Thick, long, or double-coated breeds (Newfoundlands, Samoyeds) require extensive brushing and drying.
- Size of the Dog – Larger dogs naturally take more time to wash, brush, and dry.
- Grooming Frequency – If a dog is groomed regularly, each session is quicker because there are fewer tangles and mats.
- Age & Health – Senior dogs or those with mobility issues may need more breaks, making the process longer.
- Coat Condition – Severely matted dogs take extra time because mats must be carefully detangled or shaved.
Pro Tip
Regular brushing between grooming sessions keeps your dog’s coat in good shape, reducing the time needed for professional or at-home grooming.
How Often Should a Dog Be Groomed?
Every dog has different grooming needs based on their breed, coat type, and activity level.
General Grooming Guidelines:
- Every 6-8 weeks – Most dogs benefit from a full grooming session.
- Every 4 weeks – Long-haired or high-maintenance breeds prone to matting (Poodles, Shih Tzus) should be groomed more frequently.
- Occasionally – Short-haired breeds (Beagles, Boxers) don’t require frequent full grooming but still need regular brushing and nail trims.
Bathing Frequency:
- Every 4-6 weeks – For most dogs.
- As needed – If your dog rolls in dirt or something smelly.
- Not too often – Over-bathing can dry out the skin and strip natural oils, leading to irritation.
Pro Tip
Regular brushing reduces the need for frequent baths and keeps your dog’s coat looking clean and healthy.
That’s A Wrap
Learning how to groom a dog at home is one of the best things you can do for their health and happiness. With patience, the right tools, and a consistent routine, you’ll have a clean, comfortable pup and a fur-free couch.
Want more dog care tips? Subscribe to our newsletter for expert advice straight to your inbox!